Share

Variables available in Layout

The following are the default variables available in Layout


  • $processor
  • $request
  • $themeDisplay
  • $company
  • $user
  • $realUser
  • $layout
  • $plid
  • $layoutTypePortlet
  • $portletGroupid
  • $locale
  • $timeZone
  • $colorScheme
  • $portletDisplay


Creating a Custom Layout

1. Create  a Layout Plugin in Eclipse
2. Open 1_2_3.tpl under docroot
3. Add the following code to the 1_2_3.tpl
 
$processor.processColumn("column-1", "portlet-column-content portlet-column-content-only")
$processor.processColumn("column-2", "portlet-column-content portlet-column-content-first")
$processor.processColumn("column-3", "portlet-column-content portlet-column-content-last")
$processor.processColumn("column-4", "portlet-column-content portlet-column-content-first")
$processor.processColumn("column-5", "portlet-column-content ")
$processor.processColumn("column-6", "portlet-column-content portlet-column-content-last")
I am going to explain the above code as snippets.If you are well aware then see the comments and get easily

Explanation of the snippets

Our requirement is to create a 1-2-3 Layout which means that i am going to take three rows respects to
First row contains one Column
Second row contains Two Columns
Third row contains Three Columns

The page looks like as follows

1. Firstly create a main <div> in the 1_2_3.tpl which it specifies the whole template
 
... ...
Must specify the values for the attributes class,id,role for the <div> and also must specify the id="main-content" and role="main".We can give any value for class

Creating a Row

2.Now create rows in the main <div>.Each child <div> element of main <div> acts as a   one row.As per our requirement we need three rows so lets create three rows by creating three <div> as a child elements of main <div> as follows
......... .........

Create a three <div> elements as like above

Each row <div> must specify the portlet-layout row-fluid CSS class as a class attribute value.

Creating a Column in a Row

3. Each child <div> element of row <div> acts as a one column in a row.As per our requirement we need different columns in different rows so lets take second row where i need to create three columns by creating three <div> as a child elements of row <div> as follows

 
......... ......
........... ...........

Each column <div> has a class attribute values as portlet-column,portlet-column-first span6
portlet-column : Specifies that the respective <div> acts as a Column
portlet-column-first : It represents first column of row
span[] : It represents width of the column in a row.The value should be in between 1 to 12 because it follows 12 cells grid system.


Each column <div> has a id attribute as well.You can identify the column as column-[number]
column-3 : It specifies that the respective column is Third column.

Rendering portlets in the respective columns

4. Include a Velocity template directive to render each column’s portlets. User drops a different portlets in different columns so add the following function in each column of the row

$processor.processColumn("column-2", "portlet-column-content portlet-column-content-first")

It takes two areguments the first is the CSS Column ID and Second is list of CSS Classes.These classes we must pass as arguments.And also has to pass portlet-column-content-[first | last | only as second argument.

Anatomy of Layout

A Layout is single instance of a single page,composed of one or more portlets arranged inside of various columns.A layout is somewhat synonymous with a page.They have a unique internal ID known as the "portlet layout id"

Lets see now Anatomy

Create  a Layout Plugin in Eclipse and you will see as follows


The folder structure is same like other plugins but we have other files like .png, .tpl and .wap.tpl

File Name
Purpose
Liferay-layout-templates.xml
Specifies the name of the template files and the location of their TPL and PNG files
Liferay-plugin-package.properties
Describes the plugin project to Liferay’s hot deployer.
1_2_3.tpl
Generates the HTML structure of the Template
1_2_3.png
Thumbnail image for layout in the UI[Page Layout Screen]
1_2_3.wap.tpl
Variant template for mobile devices


Creating a Layout in Eclipse

1. Open the eclipse which contains Liferay Environment
2. Goto File | New | LiferayPluginProject
3. Give the Project name as 1-2-3-layout then Display name became as 1-2-3-layout.Put the
    default values for Build Type,Plugins SDK and Liferaay Runtime.Select the plugin type as       Layout.

4. Click on Finsish
5. Observe the Project Explorer now,You can have a layout named as 1-2-3-layouttpl as follows


Embedding a portlet in a Theme

We have seen already one use case which is Navigation Portlet for embedding a portlet in a theme.I am just taking one sample portlet which is going to embed in a theme.Some of the other use cases are embedding the QuickLinks and Assets

Steps to Embed

1. Create one portlet which is to be embed in a theme(ThemeEmbeded-portlet)
2. Deploy the portlet
3. Open portal_normal.vm under docroot/_diffs/templates which is in our custom theme GreenTheme
4. Add the following code to the portal_normal.vm
............. .............
#set ($portlet_id="ThemeEmbedded_WAR_ThemeEmbeddedportlet") $theme.runtime($portlet_id, '', $velocityPortletPreferences.toString())
............. .............
$portlet_id is velocity variable and i assigned a embed portletId to this variable
$theme is a run time variable available in velocity template
runtime is a function
5.Re-Deploy the theme and refresh the page then you can see the portlet

Color Schemes for a Theme

A color scheme is used to crate different style and appeal for the same theme.In the precious post i created the GreenTheme. For that one lets create a two different  color_schemes as follows.

Steps to create Color Schemes

1. Open GeenTheme in project explorer
2. Create color_schemes folder under docroot/_diffs/css
3. I to add two flavors to a theme
           dark.css
           light.css
So create two css files dark.css and light.css files under docroot/_diffs/css/color_schemes
4. Open liferay-look-and-feel.xml and add the following lines under the <theme> tag

.........
.........

 default


 dark


 light

..........
..........

5. Now open dark.css under docroot/_diffs/css/color_schemes and add the following styles
@import "compass";

.aui .dark{
 background: #60CDB5;
 color:#FFF;
 /* ---------- Nav#Navigation ---------- */

 #breadcrumbs {
  padding-left: 10px;
 }

 #navigation {
  .navbar-inner {
   background: #2F2F2F;

   .nav > li > a {
    color: #E3E3E3;
   }
  }
 }
}

I just changed the background of body and Navigation.You can modify as you need.

6. Make sure that the dark.css and light.css has to import in custom.css which is under docroot/_diffs/css/custom.css
.........
.........
@import url(color_schemes/dark.css);
@import url(color_schemes/light.css);
.........
.........
7. Now deploy the theme by running ant-deploy
8. Let's test now in the browser.
    Goto an organization and SignIn as Adminisrator
  http://localhost:8686/web/liferaygnosis/home
9. Goto SiteAdministration under Admin controls
10. Under Look and Feel you can see the flavors of a theme if you have applied the GreenTheme to the organization


11. Choose dark flavor and click on Save.Now click on View Pages in this screen only,It navigates to the organization.


12. If you observe the choosing the theme flavor  image there is no thumbnail for dark and light flavor.

Creating a Thumbnail for Theme Flavors

1. Create color_schemes folder under docroot/_diffs/images
2. Create two folders with names given in the <css-class>dark</css-class> tag.Lets
    give folder names as dark and light
3. Place one image in the each of the folders which its name should be thumbnail.png
4. Now run the ant-deploy and check it now.


Now we can see the thumbnail image for dark flavor.

How to Unsplit the Toggle Controls and Dockbar

As you can observe the add and edit toggle controls are parked at top left side of the page and Administration dock bar at top right side of page.
But if we give the same design to the client or any non technical person(Administration of CMS),it is really bit confused to the user.So that here i am going to tell how to unsplit those two controls i.e both the controls will rendered under one dock bar as following image shows


Unspliting the Toogle controls and Administration controls

1. Copy init_custom.vm from docroot/templates to docroot/_diffs/templates
2. Open the init_custom.vm from docroot/_diffs/templates
3. It contains only one line which splits the dockbar
4. Just comment the line and save it(Add # start of the line to comment in velocity)
##set ($css_class = "${css_class} dockbar-split")
5. Run the ant-deploy
6. Refresh the screen then you will get the screen which is shown earlier.

Now lets move on to how to set the styles for this Dockbar

Setting the Styles to the Dockbar

1. Open common_custom.css under docroot/_diffs/css/common_custom.css
2. Search for .navbar-inner which is under .dockbar class definition
3. Change the value of background attribute as you need
.dockbar {
  .navbar-inner {
   background: #F9901A;

   .container .btn-navbar {
    color: #FFF;
   }
  }
............
............
}

Sample Image:


THEME CONFIGURABLE SETTINGS FOR SITE ADMINISTRATORS

We can define a settings for a theme to be configurable by Site Administrators.As part of settings we can configure a checkbox,text,textarea and select.

Default setting type is input text filed

Lets learn how to add configurable setting to the theme

Adding Configurable Setting to a Theme

If you go through the previous post already i discussed how to create a custom theme.You can understand this concept only if you are aware of custom theme creation.

Usecase: I want to give the configurable setting to administrator to show the footer of the page

1. Create a theme
2. Open liferay-look-and-feel.xml under docroot/WEB-INF
3. Add <settings></settings> tag in between the theme's <theme></theme> tags
4. Add a <setting> element in between <settings></settings> tags as many as you want.
5.To make a setting configurable from the portal, you must add the attribute "configurable=true" to the <setting></setting> element

 
  6.2.0+


6. Now go to the organization which you have applied the theme.(Organization name for myself:liferaygnosis) And the URL will be like as follows
http://localhost:8686/web/liferaygnosis/home

7. Login as a Site Administrator and Goto the SiteAdministration under Admin control
8. Under Look and Feel section you can observe the settings for the theme which is for giving the provision to Site Administrator weather to display Power by company or not on the page


Now lets do the actions:
By default liferay page shows the Powered by Company name as follows
8. Now lets go to the theme settings and uncheck checkbox for Display Powered by as i said earlier how to go there.
9. Then refresh the organization page and observe the screen as there is no Powered by


In this way we give the provision to the SiteAdministrator to configure Theme Settings

Custom Theme Creation Tutorial


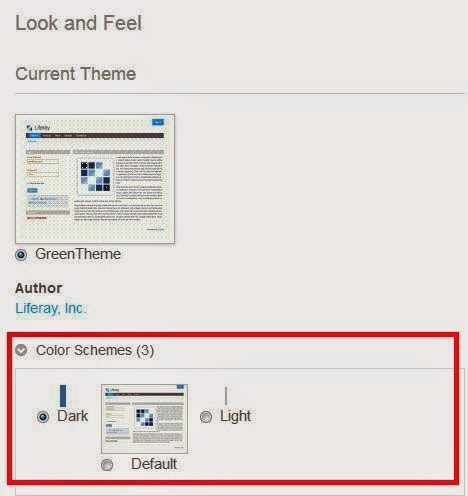
In this post I am going to give the basic steps or to get basic design to create a custom theme.The following screen shows the theme done by my own hands


Steps to create a theme in Eclipse IDE

1. Open the Elcipse IDE
2. Goto File | New | LiferayPlugInProject
3. Give the ProjectName as GreenTheme. Automaticaaly DisplayName become as GreenTheme
4. Put the defaults for Build Type,Plugins SDK and Liferay runtime.
5. Check the Plugin Type as Theme then click on Finish. 


6. Then in the next dialogue box it asks for Theme parent and Theme Framework.Give
                 Theme parent as classic
                 Theme framework as Velocity


A custom theme inherits the _styled theme by default.Liferay portal by default  uses the Velocity template files 

7. Then click on Finish and observe project explorer


8. The theme is created now its time to get work for our hands to get the above screen.Let's start

To get the above screen we are taking consideration of two files.Those are
        portal_normal.vm:It contains the rendering code which fragment has to show in which place of                                          the page
        custom.css:  To apply our CSS Styles

Theme Creation Introduction

1. Go through the Anatomy of Theme
2. The name _diffs stands for differences. The files in this directory will override the files in
        docroot/css, docroot/images , docroot/js , docroot/templates
3. By defult _diffs is empty.to override existing theme we need to add the css folder,images folder,js
    folder, templates folder.
4. If you want to change existing style class definitions in other CSS files,You can redefine them in
    docroot/_diffs/css/custom.css file.

Why custom.css file will override the styles defined in other CSS files?
Ans: This is because the custom.css file is imported last as specified in docroot/css/main.css.(If you open and see then  you can get exactly what i am saying).

There are four basic folders in theme css/ , images/ , js/ and templates/

As compared to Liferay 6.0.6 the the syntax is variant in Liferay6.2. It uses the Saas.
    Saas is an extension of Css
    Saas is a scripting language for writing Css
    Compass is an open source CSS authoring tool.

How to add a new div to the page

1. Create css and templates folders in _diffs
2. Copy custom.css from docroot/css/ to the docroot/_diffs/css/
    Copy portal_normal.vm from docroot/templates to the docroot/_diffs/templates
3. Now get to the our point adding new div to the page
4. Open docroot/_diffs/templates/portal_normal.vm and add the following code after the <body>
    tag it self as follows

5. Save the file
6. Now apply the Styles to that particular divs in the file custom.css in the directory
    _diffs/css/custom.css
#top{
 width: 100%;
 font-size: 10px;
 background-color: #036;
 height: 45px;
 
  }
  #topbottom{
 width: 100%;
 height: 8px;
 background-color: #FF0000;
  } 
 
7. Save the file and run ant-deploy
8. Apply our theme to the Page or Organization
9. Observe the screen.You will get the following output

Basic Navigation Controls
  How to set the width of the page

If we want to set the width of the page add the below snippet to the _diffs/css/custom.css
#wrapper {
  position: relative;
  width:100%;
  padding:0;
 }

Save the file & Run ant-deploy
Observe the changes in the screen

How to hide the breadcrumbs in the theme 

Open the file _diffs/css/custom.css and add the following code
#breadcrumbs{
 display:none;
}

How to change the color of Navigation bar

Open the file _diffs/css/custom.css and add the following code
You no need to define newly .navbar-inner class.It is already there in the file.
Just search for this class and add the code.
.navbar-inner {
   background-color: #FFF;     

   li a {
    color:#333333; 
   }
  }

In the above i just changed the color of the navigation bar but we can set width and height of the bar.

Sample image:


How to adjust the padding for Navigation bar menu items

1.Open the file _diffs/css/custom.css and add the following code
2.Just search for
li>a 
and add the your own code.
.nav {
   li {
    &.dropdown {
     > .dropdown-toggle {
      .caret {
       border-bottom-color: #FFF;
       border-top-color: #FFF;
      }
     }
    }

    &.open {
     > a {
      background-color: #036;
      color: #FFF;
      border-top: 2px solid #FF0000;      
     }
    }

    &.active > a {
      background-color: #036;
      color: #FFF;
      border-top: 2px solid #FF0000;
    }
   }

   > li > a {
    padding: 4px 15px 5px;
   }

How to change the navigation menu item on hover color in the Navigation bar

1.Open the file _diffs/css/custom.css and add the following code
2.Just search for
&.open {
     > a 
and add the your own code.
.nav {
   li {
    &.dropdown {
     > .dropdown-toggle {
      .caret {
       border-bottom-color: #FFF;
       border-top-color: #FFF;
      }
     }
    }
    /* Here add your own code to change the on hover color*/
    &.open {
     > a {
      background-color: #036;
      color: #FFF;
      border-top: 2px solid #FF0000;      
     }
    }

    &.active > a {
      background-color: #036;
      color: #FFF;
      border-top: 2px solid #FF0000;
    }
   }
Observe the comments i specified.

Sample Image
Observe the "Home" on hover i changed the color.

How to change the  highlighting color of  current/active page navigation menu item  in the Navigation bar

1.Open the file _diffs/css/custom.css and add the following code
2.Just search for
active > a 
and add the your own code.
.nav {
   li {
    &.dropdown {
     > .dropdown-toggle {
      .caret {
       border-bottom-color: #FFF;
       border-top-color: #FFF;
      }
     }
    }
    /* Here add your own code to change the on hover color*/
    &.open {
     > a {
      background-color: #036;
      color: #FFF;
      border-top: 2px solid #FF0000;      
     }
    }
    /* Here add your own code to change the active  page color*/
    &.active > a {
      background-color: #036;
      color: #FFF;
      border-top: 2px solid #FF0000;
    }
   }
Observe the comments i specified.

Sample Image
Changing the Active page/Current page highlighting color

How to change the sub menu items color of main menu item in navigation bar

1.Open the file _diffs/css/custom.css and add the following code
2.Just search for .dropdown-menu class and add the your own code.
/*Changing the color of submenu items of main menu of Navigation bar*/
   .dropdown-menu {
    background: #036;
    opacity:1.0;
    border-width: 0;
    margin: 0;

...............
...............
Observe the comments i specified.

Sample Image
Changing the color of sub menu items

How to change the sub menu items on hover color of main menu item in navigation bar

1.Open the file _diffs/css/custom.css and add the following code
2.Just search for :hover class and add the your own code.
/*Changing the color of submenu items of main menu of Navigation bar*/
a {
     color: #fff;
     border-bottom: 1px solid #FFF;
     ...............
     ...............
}
/*Changing the  submenu items on hover color of main menu of Navigation bar*/
&:hover {
      background: #036;
      text-decoration: none;
      border-left-color:transparent;
      border-right-color: transparent;
      border-bottom: 1px solid #FFF;
      opacity:0.2;
      z-index:1000;
     }
    }
Observe the comments i specified.

How to remove the company name

1.Open the file _diffs/css/custom.css and remove the following code

$the_title


Dockbar related styles


How to change the color of dock bar

1.Open the file _diffs/css/custom.css and add the following code
2.Change the values of following these three four variables
$dockbarGradientEnd: #036;
$dockbarGradientStart: #036;
$dockbarOpenGradientEnd: #036;
$dockbarOpenGradientStart: #036;

Sample Image
Before:

After:

How to change the dockbar menu item on hover color in Dock bar

1.Open the file _diffs/css/custom.css and add the following code
2.Search for :hover which is under .docbar class defination & change the on hover color
.dockbar {
   ..............
   ..............
    /*Change the on hover color of menu item*/
       &:hover {
  background-color: #184D83;
  opacity:0.8;
 }
  ...............
  ...............
}
How to change the submenu items color of dockbar menu item

1.Copy custom_common.css form docroot/css to docroot/_diffs/css
2.Open the file _diffs/css/custom_common.css
3.Search for .dropdown-menu and change the value of background
/*Chnage the dropdown toggle color*/
    .dropdown-menu , .site-administration-menu {
     background: #036;
     -moz-box-shadow:    inset 0 0 8px #000000;
     -webkit-box-shadow: inset 0 0 8px #000000;
      box-shadow: inset 0 0 8px #000000;
                                        .................
                                        .................
}

Sample Image:


How to change the submenu items on hover color of dockbar menu item

1.Copy custom_common.css form docroot/css to docroot/_diffs/css
2.Open the file _diffs/css/custom_common.css
3.Search for :hover which is under .dropdown-menu class definition
.dropdown-menu , .site-administration-menu {
                                  .................
                                  .................
     /*changing the color of sub menu items on hover color of menu item of dockbar*/
      &:hover {
       background: #184D83;
       @include filter-gradient(#2FA4F5, #2FA4F5, vertical);
      }
                                 ..................
                                 ..................
}

Portlet related styles

How to change the portlet header color

1.Open the file _diffs/css/custom.css
2.Search for .portlet-topper class and change the value of background attribute as you want.
.portlet-topper {
  background: #036;
  color: #FFF;
  padding: 0;
  ............
  ............
}

I just changed the portlet topper color if you go through the custom.css portlet related styles section you can do changes as your need.

Toogle Controls(which are in the left side of the page)

How to change the background color of toogle controls

1. Open custom.css in _diffs/css
2. Search for > a which is under the .nav-add-controls class definition
3. Change the value of background attribute as you need
.nav-add-controls {
...................
...................
li > a{
         background: #036;
         border-bottom:3px solid #FF0000;
  line-height: inherit;
         ...........
  }
.............
}
Sample Image


How to change the on hover color of toogle controls

1. Open custom.css in _diffs/css
2. Search for :hover which is under >a in turn it is under .nav-add-controls class definition
3. Change the value of background attribute as you need
.nav-add-controls {
...................
...................
li > a{
         background: #036;
         border-bottom:3px solid #FF0000;
  line-height: inherit;
         ...........
         ...........
     &:hover {
  background: #184D83;
 }
     ..............
  }
.............
}
Download Theme here for 6.2

Suggested Links
How-to-unsplit-Toggle-controls-and-Dockbar

Cloning of Classic Theme / Creating a Theme

What theme is comprises of?
  • Dockbar
  • Company Logo
  • Navigation Bar
  • Footer
By default Liferay comes with four themes and those are
  • _styled
  • _ unstyled
  • classic
  • control_panel
The above themes have some hierarchy i.e


1. In eclipse Liferay  IDE File | New | Liferay Plugin Project
2. A Dialogue box will be shown to you to enter the Project Name as CustomTheme then
    automatically display name become CustomTheme
3. Keep the default values for Liferay Plugins SDK and Liferay Portal Runtime
4. Select the Theme in Plugin Type Selection area.
5. Click on Finish
A theme will be appear in the Project Explorer


If you observe the created theme folder structure by default it comes with a some set of folders and set of files inside it.If you want to know about each and every file then go through the this link.

6. Now run the ant-deploy of theme.

Checking theme is deployed or not / Apply the theme to a page

1. Login as Administrator
2. Navigate to Add|Page and give the page name as CustomTheme
3. Click on the AddPage and page will be created with the given name
4. Goto the newly created page then click on the edit icon of the page in the leftside icons navigation menu


5. In the Edit Page menu you can find the Look and Feel subsection if you scroll down
6. Click on the radio button for Define a specific look and feel for this page.


7. You will find a our theme "CustomTheme" under Available themes whose Thumbnail is missing
8. Click on the Radio button of that theme and click on the SAVE button.The page will be refreshed and theme will be applied to the page.The screen looks as follows


How to set the Thumbnail image for Theme

1. Take one image
2. Resize it as per requirements
3. Name it as a "thumbnail.png"
4. Paste it in CustomTheme/docroot/images
5. Run the ant-deploy
6. Now observe the screen.The theme shows the thumbnail  image as follows


When we create a theme by default it inherits _styled.So if you observe above screen ,It is applied our CustomTheme and not yet styled.
1. To know that one open build.xml of theme and you can find that theme.parent value as "_styled"
2. Change the that value as "classic"
3. Run ant-deploy
4. Create a new page name as "ClassicCustomTheme" and  applied our theme  CustomTheme.

The above process is also called Cloning of Classic Theme

Anatomy of Theme


When we create a new theme it has the following structure
  • docroot
    • _diffs
    • css
    • images
    • js
    • META-INF
    • templates
    • WEB-INF
      • lib
      • liferay-look-and-feel.xml
      • liferay-plugin-pacakage.properties

_diffs : It stands for differences.The files in this directory will override the portal default styles
css : It has sub folders and sub files.Each of the files have some particular specification as follows


File Name
Purpose
Example
application.css
This file defines the stylesheets for general use of all the servlets and portlet applications
Search results table
.results-header
 base.css
Style definitions for browser normalization and customized styles for HTML Elements
Ul,li
 custom.css
This file is empty by default.We should customize the styles which are defined in _style theme

 dockbar.css
Styles for the dockbar portlets

 extra.css
Newly added style definitions

 forms.css
Styling for form input elements

layout.css
Css classes used for the layout templates

 navigation.css
Specific classes related to navigation bar in a theme

 portlet.css
Styling specific to portlet
Portlet  title bar,portlet content,portlet border
 main.css
Imports the rest of css files.Open this file and observe.


images : It contains all the images of the portal in a segregated manner. You can find the respective images in a respective folders by name itself.
js : It has only one file i.e main.js.It contains the javascript  code related to theme
templates : It contains the velocity or free marker template files.


File Name
Purpose
Init_custom.ftl
To initialize custom velocity variables.
Navigation.ftl
For two level menu style in creating theme
Portal_noraml.ftl
It generates whole HTML file and send it to the browser
Portal_pop_up.ftl
For rendering of a popup window in Liferay portal
Portlet.ftl
For rendering portlet
 
WEB-INF : It contains liferay-look-and-feel.xml and liferay-plugin-package.properties
   liferay-look-and-feel.xml: It contains the themeId and theme settings and to get the color scheme
   liferay-plugin-package.properties : It contains the information about the theme name,licences
   and version